Step 1: Planning Your Application
This is part 1 of an 18 part series titled Vue.js Application Tutorial - Creating a Simple Budgeting App with Vue. It is highly recommended that you read the series in order, as each section builds on the last.
- Step 0: Intro
- Step 1: Planning Your Application
- Step 2: Data Architecture
- Step 3: Setup & Project Structure
- Step 4: Create & View Accounts
- Step 5: Edit & Delete Accounts
- Step 6: Adding LocalStorage to our Vue.js Application
- Step 7: Interlude & Refactor
- Step 8: Budgeting
- Step 9: Racing Through Budgets
- Step 10: Styling & Navigation
- Step 11: Finishing Budgets with Vue.js Dynamic Components
- Step 12: Planning for Transactions
- Step 13 - All Aboard the Transaction Train
- Step 14 - User Testing
The next entry is expected to be published on 03 August 2017. Sign up using the form at the bottom of this post to receive updates when posts are published.
Any time you are writing a program more complex than a todo list, it pays to sit down and plan out the application before diving into the code.
In this tutorial we are going to build a fairly simple, straight forward budgeting app for individuals and families. Hopefully this has a broad enough appeal to be useful or at least relatable to everyone. Most importantly though, there are many, many principles we'll discuss that extend to any application built with Vue. I find building a real world application is a much more rewarding and stimulating project than something theoretical like another todo app. And you never know, maybe we'll come away with an application that people will actually use!
View a work in progress demo of the budgeting application
Small disclaimers: I'm not a financial expert, or a budgeting expert. I'm not making any claims that this is a good system, or that it is a secure way to store and track your information. Always use common sense. This application is largely based off my experience using the original, offline version of You Need A Budget, which at its heart is a digital version of the envelope system. I am also writing this application live, i.e. I don't already have a completed app I am rebuilding. (No pressure!) So expect to see me make mistakes along the way, and refactor ugly code. I believe that is all part of the process of learning and something that is often left out.
Approaching the development process
Some people like to start with building the front end interface using placeholder data, so that you have a rough prototype that is one step beyond mockups. This might be called an outside-in or a top-down approach. An inside-out, bottom-up approach begins with the data, then how to access and manipulate it, and works outward toward the views.
- Outside-in: Create some mock data. Build out all of the main application screens as read only using that data. Then start replacing the mock data as we build out add/edit screens.
The benefit to this approach is we get a holistic, big picture view of the application very quickly. It's not only very gratifying, but it allows us to refine our approach and correct any flaws early on before we get into the more tedious job of dealing with data input.
- Inside-out: Create the complete data structure, along with its API. In Vue.js terms this means building out our store complete with mutations, actions, and any getters. Since our data is well defined early on, building the application becomes a process of creating an access point (front-end) for the various ways in which we view and manipulate data, and then tying them together.
- Modular: Build out one part of the application at a time, complete with data entry. Here we might build the transactions section - the list page, the add/edit page, deleting transactions, and storing the data. Then we would move on to accounts, and then to budgeting. During each step we could work inside-out or outside-in.
This method gives us very complete and independent sections of the application quicker, but it focuses less on how they all tie together. We might have to create fake data in the interim.
None of these approaches is wrong for a solo developer working on a side project. For the sake of this tutorial, I will be working in a modular method, inside-out - that will allow me to build independent pieces quickly to keep the reader engaged. It also fits well with the structure of this application.
Sketchwork
I spent about an hour planning this application. I sketched a rough idea of what the various screens would look like.
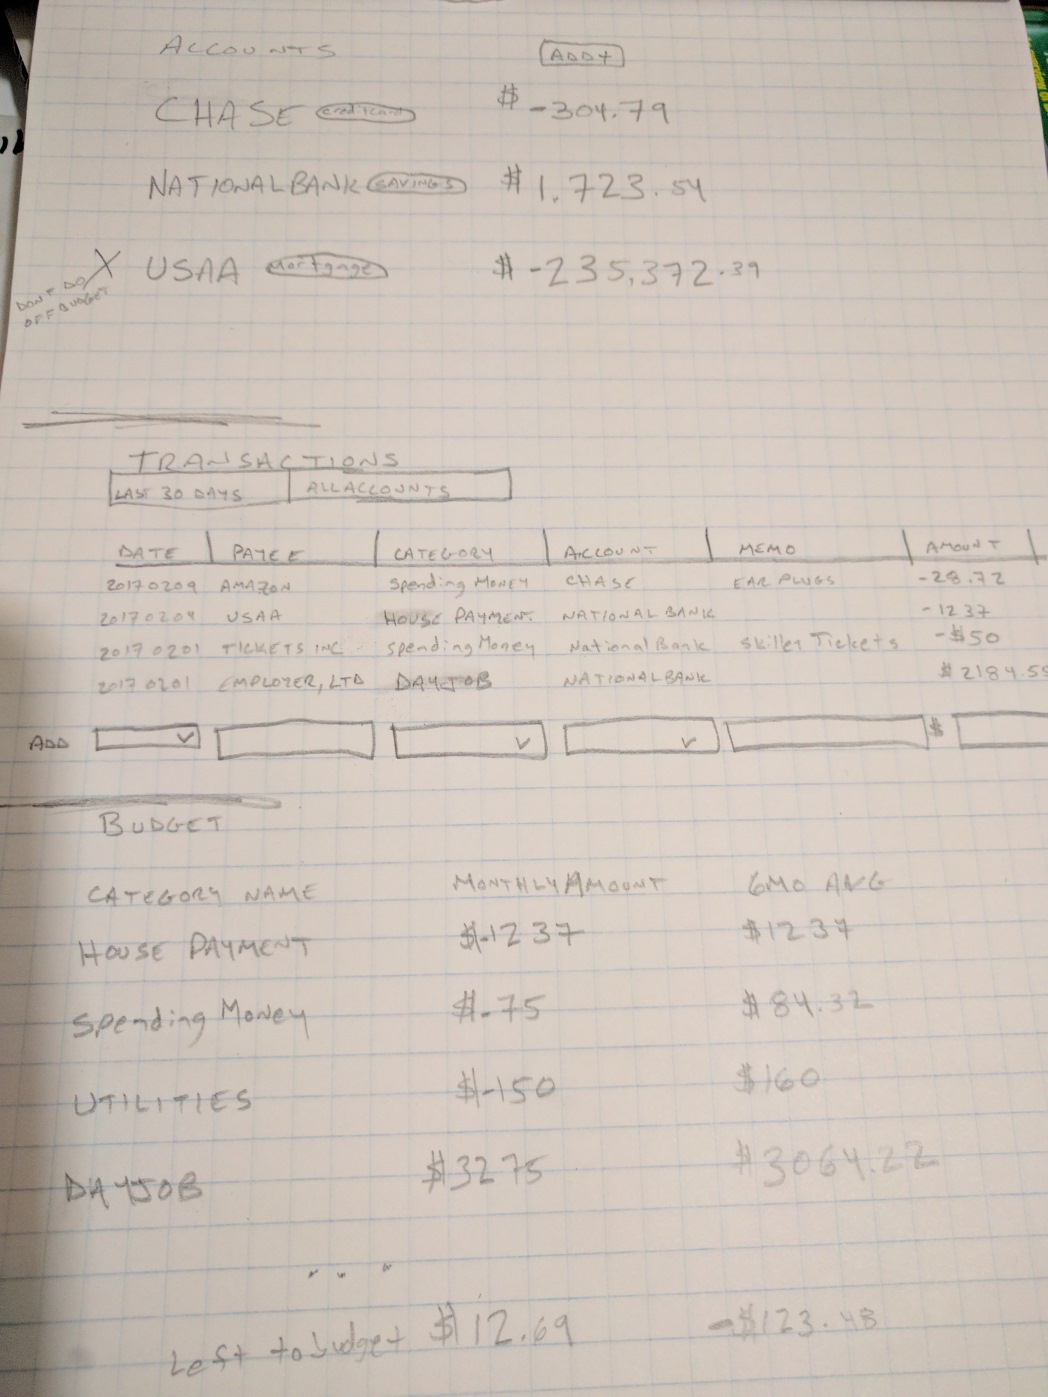
This helped me cut out a number of features that I was considering including. They felt unnecessary once they were drawn out. On the whole, I came back to the computer with a simpler approach to the application. It's better to start with a sturdy core and add features on later.
After these low fi sketches, I mapped out a rough idea of the data structure.
All of these worked together to help me come up with the different modules we will deal with.
- Transactions - where the user can view a history of expenditures and add new ones
- Accounts - tracking various banking and credit card accounts
- Budgeting - where the user can alot money to certain categories, and view their overall finances